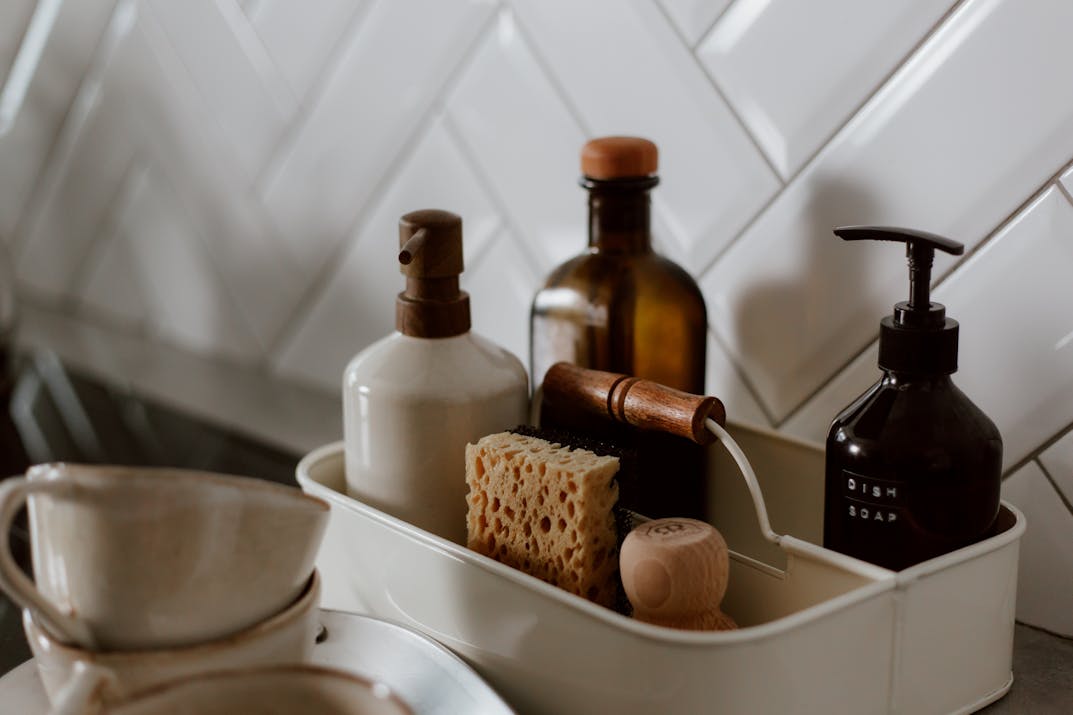
Daring Bakers: April Cheesecake

I just can’t win when it comes to this blog! I’m awful at updating. I love taking the pictures, editing them, and getting them just right, but I hate actually writing up these entries. That was always my problem with making websites. I could spend hours on the web design, but dreaded actually making content. Anyway, I actually completed this challenge at the very beginning the month. I was so proud of myself! For once I would write up my post early and wait for it to automatically post on the magic Daring Baker’s posting day. For once I would be ahead and not scrambling to get this entry done near midnight the night before. However, April also happened to the month of final exams so my early procrastination only left me the last two weeks of April, which were completely dedicated to studying till I died. Of course the need to relax for a bit and finally a summer job got in a the way and well… you know the rest!

The April 2009 challenge was hosted by Jenny from Jenny Bakes. She has chosen Abbey’s Infamous Cheesecake as the challenge.

I was relieved the moment I saw April’s Daring Baker’s Challenge. I love the great and beautiful people at DB, but sometimes they choose recipes that are complicated and include so many ingredients that I just can’t afford to participate. April’s choice was perfect! A cheesecake! How simple, right? We were given a basic recipe and allowed to get as creative as we wanted with it. Not only was it cheap because I all I had to buy was cream cheese and then use whatever I had on hand, but it also granted everyone so much freedom to make a billion types of variations.

I made two cheesecakes for this challenge (I actually had planned on another, but never had time for it)! One was a Bailey’s Irish Cream cheesecake with a dulce de leche swirl and devil’s food cake base and the other was Tiramisu because I’m obsessed with that amazing dessert.

Abbey’s Infamous Cheesecake

Crust:
2 cups / 180 g graham cracker crumbs
1 stick / 4 oz butter, melted
2 tbsp. / 24 g sugar
1 tsp. vanilla extract

Cheesecake:
3 sticks of cream cheese, 8 oz each (total of 24 oz) room temperature
1 cup / 210 g sugar
3 large eggs
1 cup / 8 oz heavy cream
1 tbsp. lemon juice
1 tbsp. vanilla extract (or the innards of a vanilla bean)
1 tbsp liqueur, optional, but choose what will work well with your cheesecake

  1. Preheat oven to 350 degrees F (Gas Mark 4 = 180C = Moderate heat). Begin to boil a large pot of water for the water bath.
  2. Mix together the crust ingredients and press into your preferred pan. You can press the crust just into the bottom, or up the sides of the pan too - baker’s choice. Set crust aside.
  3. Combine cream cheese and sugar in the bowl of a stand-mixer (or in a large bowl if using a hand-mixer) and cream together until smooth. Add eggs, one at a time, fully incorporating each before adding the next. Make sure to scrape down the bowl in between each egg. Add heavy cream, vanilla, lemon juice, and alcohol and blend until smooth and creamy.
  4. Pour batter into prepared crust and tap the pan on the counter a few times to bring all air bubbles to the surface. Place pan into a larger pan and pour boiling water into the larger pan until halfway up the side of the cheesecake pan. If cheesecake pan is not airtight, cover bottom securely with foil before adding water.
  5. Bake 45 to 55 minutes, until it is almost done - this can be hard to judge, but you’re looking for the cake to hold together, but still have a lot of jiggle to it in the center. You don’t want it to be completely firm at this stage. Close the oven door, turn the heat off, and let rest in the cooling oven for one hour. This lets the cake finish cooking and cool down gently enough so that it won’t crack on the top. After one hour, remove cheesecake from oven and lift carefully out of water bath. Let it finish cooling on the counter, and then cover and put in the fridge to chill. Once fully chilled, it is ready to serve.
  6. Pan note: The creator of this recipe used to use a springform pan, but no matter how well she wrapped the thing in tin foil, water would always seep in and make the crust soggy. Now she uses one of those 1-use foil “casserole” shaped pans from the grocery store. They’re 8 or 9 inches wide and really deep, and best of all, water-tight. When it comes time to serve, just cut the foil away. I actually used a normal 6 inch cake pan, but buttered the sides of the pan and then lined it with parchment paper. I wanted to make small cheesecakes, but didn’t want to waste money on a new springform pan. Luckily this trick worked perfectly and the cheesecake came out easily!

    Prep notes: While the actual making of this cheesecake is a minimal time commitment, it does need to bake for almost an hour, cool in the oven for an hour, and chill overnight before it is served. Please plan accordingly!


Bailey's Irish Cream cheesecake with dulce de leche swirl

Bailey’s Irish Cream Cheesecake

Components:

  • Devil’s food cake crust
  • Bailey’s Irish Cream cheesecake
  • Dulce de Leche swirl
  • Optional whip cream for decoration

The Steps I Took:
Assembling this cake is fairly easy and all needed recipes have been provided below.

  1. Make the devil’s food cake with the recipe provided below. Follow the baking directions exactly and set aside while it cools. I actually think I made the cakes the night before.
  2. To make the dulce de leche, instead of doing that silly can boiling method, I instead poured all of the unsweetened condensed milk into a saucepan and allowed it to cook at around medium to medium-high heat for at least an hour. This way is much faster, safer, and easier do because you can actually see how dark and thick it’s become over time.
  3. In order to make the cheesecake I simply followed the provided cheesecake recipe (skipping the crust of course), excluded the lemon juice, and added about 2 tbsp of Bailey’s Irish Cream. You can decide how much you want to use. I merely did it based on how it tasted.
  4. Now that you have your cheesecake items ready, pour the cheesecake mixture into your pan, then spoon some of dulce de leche on top and use a knife to cut through it and make a marbled effect.
  5. Bake the cheesecake as directed, then let it cool on a wire rack. Once at room temperature you can begin to assemble everything! Take your devil’s food cake base (you can cut it down a bit if it looks too big) and cover it with a layer of dulce de leche. Place the cheesecake on top, then slather another layer of ducle de leche on top of that.
  6. For the finishing touches I took my other small devil’s food cake, made crumbs, and sprinkled them on top of the dulce de leche, being careful to push them down a bit at the end in order to make sure they stuck. I had already placed my remaining dulce de leche in a squeeze bottle (much like those red and yellow ketchup and mustard ones you get at restaurants) and striped the top with dulce de leche.
  7. I felt that it looked a little plain still and whipped up some whip cream with 1 cup heavy cream, 1/4 cup sugar, and a bit of vanilla extract. You can add some gelatin if you want to make a more stabliized whip cream, but I don’t have a recipe for that. You can look that up!
  8. Once fully put together, I put the cheesecake in the fridge to completely chill. Serve as you like.

Devil’s Food Cake

Recipe from the Devil’s Food White-Out Cake in Baking: From My Home to Yours by Dorie Greenspan.

  • 1-1/3 cup all purpose flour
  • 1/2 cup unsweetened cocoa powder
  • 3/4 cup teaspoon baking soda
  • 1/2 teaspoon baking powder
  • 1/4 teaspoon salt
  • 1-1/4 sticks (10 tbs) unsalted butter, room temperature
  • 1/2 cup light brown sugar
  • 1/2 cup sugar
  • 3 large eggs, room temperature
  • 1 teaspoon vanilla extract
  • 2 oz bittersweet chocolate, melted and cooled
  • 1/2 cup buttermilk or whole milk, room temperature
  • 1/2 cup boiling water
  • 4 oz semisweet or milk chocolate, finely chopped or 2/3 cup mini chocolate chips
  1. Preheat the oven to 350 degrees F. Butter two 8×2 round cake pans (I used two 6×3 inch cake pans) .
  2. Sift together flour, cocoa powder, baking soda, baking powder and salt.
  3. Working with a stand mixer, preferably fitted with a paddle attachment, or with a hand mixer in a large bowl, beat the butter on medium speed until soft and creamy.
  4. Add the sugars and continue to beat for another 3 minutes. Add the eggs one by one, beating for 1 minute after each addition. Beat in the vanilla. Don’t be concerned if it looks curdled!
  5. Reduce the mixer speed to low and mix in melted chocolate. When it is fully incorporated, add the dry ingredients alternately with the buttermilk, adding the dry in 3 additions and the milk in 2 (begin and end with the dry ingredients). Scrape down the sides of the bowl as needed and mix only until the ingredients disappear into the batter.
  6. At this point, the batter will be thick, like frosting. Still working on a low speed, mix in the boiling water, which will thin the batter considerably.
  7. Switch to a rubber spatula, scrape down the bowl, and stir in chopped chocolate.
  8. Divide the batter evenly between the two pans and smooth the tops with the rubber spatula.
  9. Bake for 25 to 30 minutes, rotating pans at the midway point. When fully baked they will be springy to the touch and a thin knife inserted into the center will come out clean. Don’t worry if tops have small cracks.
  10. Transfer to a rack to cool for about 5 minutes, then take it out of the pan and let cool to room temperature.

The remaining slice of the Bailey's cheesecake. Notice the bottom layer of dulce de leche oozing out!


Tiramisu Cheesecake

Components:

  • Chocolate Teddy Graham crust
  • Kahlua Cheesecake
  • Lady Fingers
  • Espresso syrup to dip the ladyfingers in
  • Cocoa powder
  • Tiramisu Cream
  • Optional whip cream for decoration

The Steps I Took:
I wnated this cheesecake to resemble tiramisu so the steps are very similar to that. All needed recipes have been provided below.

  1. To make the Teddy Graham crust use the crust recipe provided, but substitute chocolate Teddy Grahams for the graham crackers.
  2. Follow the cheesecake recipe and set the cheesecake mixture aside. You’re going to put all of the components together before baking.
  3. If you haven’t done it already, line the pan you want to use with the crust and bake as directed.
  4. Once done dip each side of the ladyfingers in espresso syrup and arrange in a single layer on top the crust. Break up pieces as needed to make it fit.
  5. Pour half of the cheesecake mixture on top of the ladyfingers, then dust with a layer of cocoa powder.
  6. Repeat the process by making another layer of  dipped lady fingers, cheesecake, and cocoa powder.
  7. Bake as directed, then set on wire rack to cool. Once at room temperature remove from pan and chill.
  8. If desired, decorate with whip cream and sprinkle cocoa powder on top. Enjoy!


Inside view of the tiramisu cheesecake to show off the layering.

Both recipes came from the Cook’s Illustrated Tiramisu recipe.

Espresso Syrup

  • 1 cup brewed espresso, room temperature
  • 2 tablespoons dark rum

Tiramisu Cream

  • 3 large egg yolks
  • 1/3 cup sugar
  • 1/8 teaspoon salt
  • 3/4 pound mascarpone (I used cream cheese)
  • 3/8 cup heavy cream
  • 2 tablespoons dark rum

I halfed this recipe, That’s why it ended up with 3/8 cup heavy cream. Double it if you want the regular amount.

  1. For the espresso syrup: combine both ingredients and set aside.
  2. For the Tiramisu Cream: In bowl of standing mixer fitted with whisk attachment, beat yolks at low speed until just combined.
  3. Add sugar and salt and beat at medium-high speed until pale yellow, 1-1/2 to 2 minutes, scraping down bowl with rubber spatula once or twice.
  4. Add 2 tablespoons rum and beat at medium speed until just combined, 20 to 30 seconds; scrape bowl.
  5. Add mascarpone and beat at medium speed until no lumps remain, 30 to 45 seconds, scraping down bowl once or twice. Transfer mixture to large bowl and set aside.
  6. In now-empty mixer bowl (no need to clean bowl), beat cream at medium speed until frothy, 1 to 1-1/2 minutes.
  7. Increase speed to high and continue to beat until cream holds stiff peaks, 1 to 1 1/2 minutes longer. Using rubber spatula, fold one-third of whipped cream into mascarpone mixture to lighten, then gently fold in remaining whipped cream until no white streaks remain. Set mascarpone mixture aside.

Tiramisu slice. Notice the custard like Tiramisu cream on top!

Sadly, I didn't realize my memory card wasn't in my camera when I took photos of the Bailey's cheesecake. When I finally realized only this small piece was left.


Daring Bakers: Chocolate Valentino

It’s the end of the month and time for a Daring Baker’s post again! In the spirit of Valentine’s Day we were instructed to make a flourless chocolate cake and accompany it with an ice cream of our choice. Having missed the last two challenges cause I’m a total lame-o, I was mega excited about doing this challenge. In fact, I actually didn’t procrastinate like I usually do and made it ahead of time! High five, Rebecca!

The February 2009 challenge is hosted by Wendy of WMPE’s blog and Dharm of Dad ~ Baker & Chef. They have chosen a Chocolate Valentino cake by Chef Wan; a Vanilla Ice Cream recipe from Dharm and a Vanilla Ice Cream recipe from Wendy as the challenge.

This cake is extremelyyy chocolatey, which is perfect for all you chocolate lovers out there. I used a huge block of dark chocolate so the ice cream was definitely needed to tone down the extreme richness of this cake. Seriously, it’s so rich that it’s hard to eat it plain, but I’m sure there are some chocolate loving people out there that would have no problem with it. I also covered my cake in brown sugar whip cream to assist in toning down the chocolateyness.

Some of the things that they told us to keep in mind while making this cake is that you should use your favorite chocolate. This cake will taste EXACTLY like the chocolate you use. This cake also has a high cocoa percentage, which increases the bitterness of a cake. If you want a sweeter cake, then use milk chocolate. Also, some people were able to make this cake with white chocolate, but it isn’t the easiest thing to accomplish because white chocolate is not the same as real chocolate. If you do produce a cake with white chocolate it won’t be the prettiest thing in the world, but I’m sure it’ll taste great.

Note on recipe - the recipe consists of 3 simple
ingredients and how you interpret them is part of the challenge. The
simplicity of this recipe gives credit to the ingredients much in the
same way of French baguette.
-This recipe comes together very quickly with a hand mixer.
-This is a very decadent cake that will sink a little as it cools but will still hold its shape.
-Very dense and fudgy cake that tastes divine.
-The top forms a light crust kind of like a brownie

Chocolate Valentino

(Recipe from Sticky, Gooey, Creamy, Chewy)
I used a 6 inch pan and got two cakes out of this recipe.

  • 16 oz/1 pound/454 grams of chocolate, roughly chopped
  • 1/2 cup (1 stick) + 2 tablespoons of unsalted butter
  • 5 large eggs, separated
  1. Put chocolate and butter in a heatproof bowl and set over a pan of simmering water (the bottom of the bowl should not touch the water) and melt, stirring often.
  2. While your chocolate butter mixture is cooling. Butter your pan and line with a parchment circle then butter the parchment.
  3. Separate the egg yolks from the egg whites and put into two medium/large bowls.
  4. Whip the egg whites in a medium/large grease free bowl until stiff peaks are formed (do not over-whip or the cake will be dry).
  5. With the same beater beat the egg yolks together.
  6. Add the egg yolks to the cooled chocolate.
  7. Fold in 1/3 of the egg whites into the chocolate mixture and follow with remaining 2/3rds. Fold until no white remains without deflating the batter. {link of folding demonstration}
  8. Pour batter into prepared pan, the batter should fill the pan 3/4 of the way full, and bake at 375F/190C
  9. Bake for 25 minutes until an instant read thermometer reads 140F/60C.  Note – If you do not have an instant read thermometer, the top of the cake will look similar to a brownie and a cake tester will appear wet.
  10. 10. Cool cake on a rack for 10 minutes then unmold.

As seen in my previous post, Brown Sugar Toffee Ice Cream with a Dulce de Leche Swirl is my current ice cream obsession so it was obvious that I’d choose to make that to go along with this cake. I decided to follow the theme of my ice cream and made brown sugar whip cream to cover the cake. I felt like a frosting would have been too much so a light whip cream was perfect. I also sprinkled toffee bits along the top and covered the sides of one of the cakes completely in toffee bits. I also added dark chocolate curls for decoration and tried to make white chocolate curls, but they turned more into flakes so I just scattered them on top too. 

This cake was good, but again not quite my tastes. I’m not a major chocolate lover and I also only like my cakes chilled, but that sort of hardened the cake too much. I think I might have also baked it too long (considering it’s hard to tell when it’s done) because my cake came out pretty dry. It was still good for a new treat to enjoy, but I think my cakes actually got thrown out in the end because no one wanted to eat them. Oh well!


My new favorite ice cream!

I don’t know why I made this ice cream the first time. Maybe I always wanted to learn how to make dulce de leche or maybe I was so mesmerized by this recipe that I didn’t care that it would be more work. I guess it really doesn’t matter because all I know now is that this ice cream is the best I’ve ever had. I love is so much that I’ve made it multiple times and would be more than happy to eat nothing, but this ice cream for the rest of my life. Brown sugar toffee ice cream by itself sounds really good, but having the gooey, delicious dulce de leche swirled throughout this ice cold custard from heaven makes it almost orgasmic.

If you’ve been dying to buy that fancy shmancy ice cream maker, then this should be your reason to go for it. Just the thought of living without this ice cream seems almost pointless. You must make it! Okay, that’s a bit overdramatic, but seriously, you get the idea. This ice cream is pretty damn good. Make it already!

Brown Sugar Toffee Ice Cream with Dulce de Leche Swirl

(Recipe from Sticky, Gooey, Creamy, Chewy)

  • 2 cups heavy cream
  • 1 cup whole milk
  • 1/3 cup granulated sugar
  • 1/2 cup light brown sugar
  • 1 pinch sea salt
  • 1 vanilla bean, split with the seeds scraped out
  • 4 egg yolks
  • 2 teaspoons vanilla extract
  • Toffee bits (as many as you want)
  • 1 cup dulce de leche (recipe below)
  1. Heat the milk, 1 cup heavy cream, salt, and both sugars in a saucepan. Add the vanilla bean seeds and pod to the mixture. Cover the saucepan and let steep for 30 minutes.
  2. Pour the remaining heavy cream into a large bowl and set a mesh strainer on top. Set aside.
  3. In a medium bowl, whisk the egg yolks, then slowly pour in the warm milk mixture, whisking constantly. Pour the contents back into the pan and cook over low heat, stirring constantly with a heat-resistant spatula until the custard thickens. Strain the custard into the heavy cream. Put the vanilla bean back into the custard and chill thoroughly.
  4. When chilled, remove the vanilla bean and freeze in your ice cream maker according to the manufacturers instructions.
  5. During the last few minutes add the toffee bits to the ice cream so that they are evenly distributed.
  6. Whisk the dulce de leche. When the ice cream is finished churning, pour it into a freezable container, alternating between scoops of ice cream and scoops of dulce de leche. Freeze to desire consistency.

I’m a total newbie when it comes to making dulce de leche. I’m sure there are plenty of other ways to make it, maybe even ones from scratch that taste better, but until I can find a store that sells it, then this one will work for me. It’s really simple and the only hard part is adding more water to the pot when it starts to get low. Also, there is a very helpful video here that you can watch.

Dulce de Leche

  • 1 can sweetened condensed milk
  1. Remove label from can. With a can opener or even a nail and hammer, poke a few holes into the top of the can so that it can’t explode.
  2. Fill a saucepan with water and place can inside. You’ll want enough water so that 2/3 of the can is submerged. Adding too much will cause the water to splash onto the top of the can and go inside your holes.
  3. Boil the water for 3-5 hours depending on the thickness desired. (I usually cook mine for 4 hours and it ends up pretty thick). Be sure to refill the water every now and then as well.
  4. Once you think it’s ready, remove the can from the water and carefully open it up. Pour all of the contents into a bowl and whisk to get the clumps out. Enjoy!

Note: When you open up the can do not be alarmed if the top of it still looks really liquidy. The bottom cooks the most so although you may have really thick dulce de leche at the bottom, you may still have a light color liquid at the top. I panicked and thought mine wasn’t done, but it will be.


Neapolitan Dynamite Cupcakes!

Valentines Day has come and gone and I was more than happy to spend it at home with my family. Who needs a significant other to enjoy Valentines Day anyways? Of course holidays, to me, are excuses to bake and I took that opportunity to finally start my Ben and Jerry’s themed cupcakes. You see, a few months ago I went through the list of ice cream on the Ben and Jerry’s website and made up cupcakes for all of the ones that sounded good to me. With Valentines Day approaching I looked back over that list and saw one that had Valentines like colors. Neapolitan Dynamite! How perfect!

Neapolitan Dynamite ice cream consists of Cherry Garcia (cherry ice cream with cherries and fudge flakes) and Chocolate Fudge Brownie (chocolate ice cream with fudge brownies) ice creams, side by side.  I decided to replicate this by making a cupcake that was half cherry and half chocolate, filled with cherry chocolate ganache, and topped with some sort of cherry frosting. In the final moments I actually forgot to mix the cherry preserves into the chocolate ganache, but it was fine anyway.

Read more


Woops! Sorry!

I’m awful, I really am! I had such faith in myself to stick to this blog and to all of my baking responsibilities and I’m blowing it! I continually put the Daring Bakers’ challenges off thinking I have ‘plenty of time’ and am always saddened when I happen to stumble upon Tastespotting at the end of the month and discover that the entire first page is nothing, but DB posts. It’s understandable that I’m completely failing at sticking to Tuesdays with Dorie because I only have a kitchen available to me on the weekends, but I could have at least made ONE thing each month. Ugh!

I actually made THREE different things this weekend, but none were post worthy. The cookies I made were another experiment to find the best peanut butter cookie recipe and they weren’t anything spectacular, I messed up on the crust AND the ganache on my cheesecake, and my cupcakes (despite what my dad says) were a complete disaster. It’s so frustrating!

I do at least have an ice cream recipe to post sometime in the near future so look forward to that! I’ve already made it twice, probably a third time this weekend, and if it wasn’t unhealthy I would absolutely consider living off of it. Mmm, it’s so unbelievably good.

Anyways, that’s all. Just wanted to make a quick update and explain what’s going on with me. Adios for now!~


Next Page →