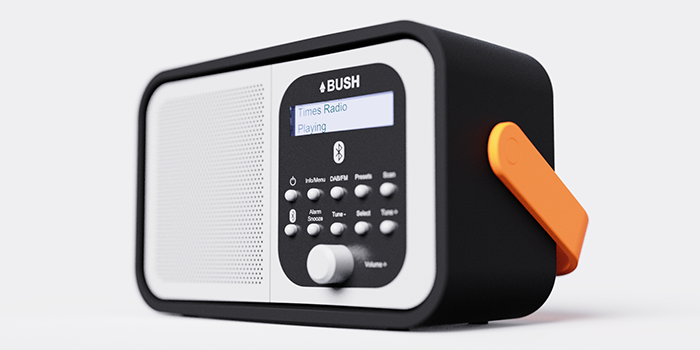
KeyShot Web Viewer provides the perfect platform to communicate CMF needs and help finalize designs across stakeholders and organizations. Not only does it allow you to package interactive scenes for distribution, but it also allows you to attach support documentation and AR/VR viewing of your scene to help communicate your project holistically.
Prepare Your KeyShot Web Viewer Upload
Once your scene is complete, including any necessary multi materials, component configurations, cameras, and environments, it’s time to upload your scene to KeyShot Web Viewer.
To open the Web Viewer upload window, locate the Web Viewer button on the Toolbar (T-key). The upload window will open and from here you’ll be able to set your web viewer upload preferences, including naming your scene and adding a password.
Choose a Quality Present
You’ll be able to select between three quality presets. If performance is most important, select the Best Performance preset. If quality is top priority, select the High-Quality preset. However, for most use cases, I recommend using the default Balanced preset for a relatively high-quality scene that doesn’t take too long to load. If you need to further customize your quality settings, you can do so under the advanced quality section.
Attach Images
To attach support imagery, you can either attach files from your computer by using the Browse Files option or by dragging and dropping them into the image list. You can also render out images from your previously set cameras by checking the Render still images from my list of cameras checkbox. This allows you to automatically include high-quality renderings to support your scene, without having to individually render and locate each image.
Activate Augmented Reality
Just beneath the Images list you’ll see the Augmented reality options. If you’d like to view your scene in AR on iOS, you need to select the dedicated checkbox to make sure it is included in your scene upload.
View Cloud Storage
And finally, just below this section you’ll find a storage indicator demonstrating how much of the available 10 gigs of included KeyShot Cloud Drive storage you have left on your KeyShot Account.
Upload & View Online
At this point, if you’re comfortable with your scene settings and ready to upload, select the Upload button and KeyShot will start to process your scene, bake textures and, if selected, render out any images from your saved cameras. Upon completion, a link will appear at the bottom of the window that you can follow or share to view your scene online.
View Your Saved KeyShot Web Viewer Scenes
To view a previously created Web Viewer scene, locate the scene within KeyShot by clicking on the Cloud Library button on the Toolbar to the bottom left of KeyShot. If you’re signed into your KeyShot Account, navigate to the My Scenes tab and you’ll find the link to your scene there. You can also visit cloud.keyshot.com and access the My Scenes tab through the browser-based library as well.
How to Navigate KeyShot Web Viewer
Once uploaded and open, you should see your scene in the center of the browser window. At the bottom right of the window you’ll find any included component configurations, your included multi-materials, as well as any saved cameras or environments. Selecting these buttons will let you cycle through the included elements listed under each category.
At the top left of the browser window, you’ll find a hamburger menu that, when selected, provides a series of tools for interacting with the Web Viewer. Here you’ll find individual camera adjustment tools as well as a performance toggle and a screenshot tool. At the very bottom of this list is the Images tab that will let you view and cycle through any images or renderings that you’ve included in your KeyShot Web Viewer upload.
And finally, near the top right of the browser window are two buttons for you to view your scene in either AR or VR.
How to View Attached Images and Renderings
As mentioned above, to view any imagery that’s been included in your Web Viewer upload, locate the Images tab inside the hamburger menu at the top left of the browser window, and select the tab to open the image viewer. Once open you’ll be able to cycle through any attached renderings or support imagery. After you’re done viewing your images, locate the same Images tab under the hamburger menu and select the tab again to return back to the Web Viewer.
How to View Scenes in AR and VR
To view your KeyShot Web Viewer scenes in AR or VR, locate the AR and VR buttons near the top right of the browser window. Once selected, follow the provided instructions for your preferred device.
If you plan on viewing your scenes in AR for iOS viewing, you will need to click the AR for iOS checkbox before uploading your scene. If you are on Android, you’ll be able to open the scene by scanning the provided QR code.
Once the QR code is scanned and opened on your mobile device, locate the AR button on near the top right of the mobile window and press it to open your scene from your device’s AR viewer.
Now You’re Ready to Use KeyShot Web Viewer
Whether you’re distributing your scenes internally to communicate progress of a project, or you need to send project information and other necessary manufacturing specs to stakeholders globally, KeyShot Web Viewer can help.
Let’s See What You Create!
We would love to see what you create with this tip. Check out the new KeyShot Luminaries online community to see what others are creating and share your own work. And if you have a suggestion for another tip, share it in the comments below.


